

Email Signatures, a deceptive but necessary evil in the building of a cohesive of corporate identity. Thousands of articles on Google detail instructions on how to create consistent email signatures, and here is another one, for our ‘frenemy’ Mac Mail on the new OS X Yosemite (10.10).
1. First you need to create your email signature using HTML. If you have no idea how to do this, drop us a line.
2. Open Apple Mail and go to Preferences > Signatures and create a signature with any random content. Name it something memorable. You will be swapping this out later.
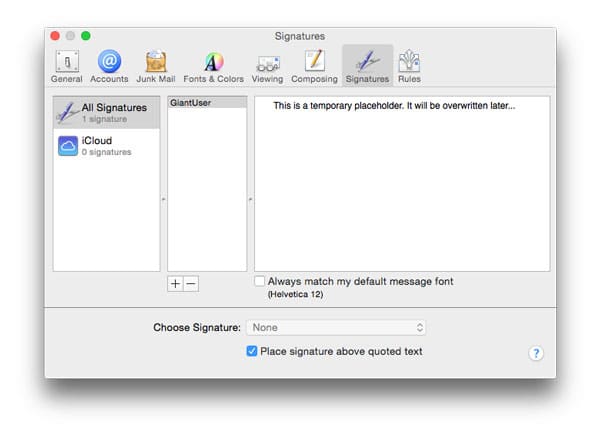
3. Associate the placeholder signature with one of your email accounts by dragging it’s name from the second column in the Preferences > Signatures window to an email account in the first column.

4. Close the Preferences window to save it, then quit Apple Mail.
5. We are going to need to locate the folder on your Mac that contains the placeholder signature. Unfortunately, you are not going to be able to use Finder to get to this folder.
Apple goes to great lengths to hide these files from people as they usually contain info that is not editable or needs to be protected. Trying to navigate through by clicking in Finder will usually lead you to Netherland or Narnia. Don’t worry though, we will walk you through an alternative method of locating these sneaky files.
Copy the following text to your clipboard into your Spotlight search bar and press enter:
~/Library/Mail/V2/MailData/Signatures/

Your Mac will open a folder with several hidden text files that looks something like the below:

6. Select the file with the long codename that ends with the suffix ‘.mailsignature’, and drag it into your TextEdit app to open it.
To ensure you have the right file, somewhere in this code you should be able to see the placeholder text you entered as a placecholder eSignature on step 4.

7. Go to the email we sent you with the code you need. Copy and paste the code from our email to your clipboard.
8. You will see a few metadata lines on the top of the file and some html code below it. Select the placeholder code, which is all of the code that sits below the ‘Mime-version’ line (or all the code after the line break). Replace it with the code you have copied to your clipboard by hitting Paste (ctrl-v).


9. Save and close the file.
10. You now need to lock the *.mailsignature file you just edited. Select it again in Finder and press Command-I to bring up the info pane for the file. On this info pane, check the “Locked” checkbox and close.

11. Open Apple Mail and go back to Preferences > Signatures. Your branded email signature now appear in place of your placeholder signature.
Note: If you have images in your signature, they will will not show correctly in the preview, but they will show in the signature (if the image source location is valid).

12. To test that it is working correctly, simply compose a new email and set the signature (right side of screen) to the one you just created. Bam.
If you have any issues getting this working (Mac Mail IS a minefield), then drop us a line to [email protected] – we would love to help!